SmileBASIC - First Impressions
I learnt how to program on calculators because I was bored in class and because they’re practical to bring around. True, they’re slow, even more sluggish today even though they have a punchier CPU than today, but boy did I had fun learning the bases of my future jobs back then.
It gave me the eternal desire to look on the perfect portable development platform, even thought it might not be what I’m looking for. A laptop’s usually too big and doesn’t have enough battery, a calculator doesn’t usually a program to compile or run script faster than the provided BASIC. This usually gives you out either a monochrome model that has limited performance but could work something out or a color model that has really not enough CPU to hold similar framerate against their monochrome equivalent. Pico-8-based handheld machines? Haven’t seen one except the Pocket C.H.I.P. and even then this computer has a rough keyboard to type on…
So when I learnt about a program to allow me to program and run a variant of BASIC with relatively good performance on a Nintendo 3DS, my first reaction was instant curiosity and said “why not”? That’s how I learnt about Petit Computer and its series.
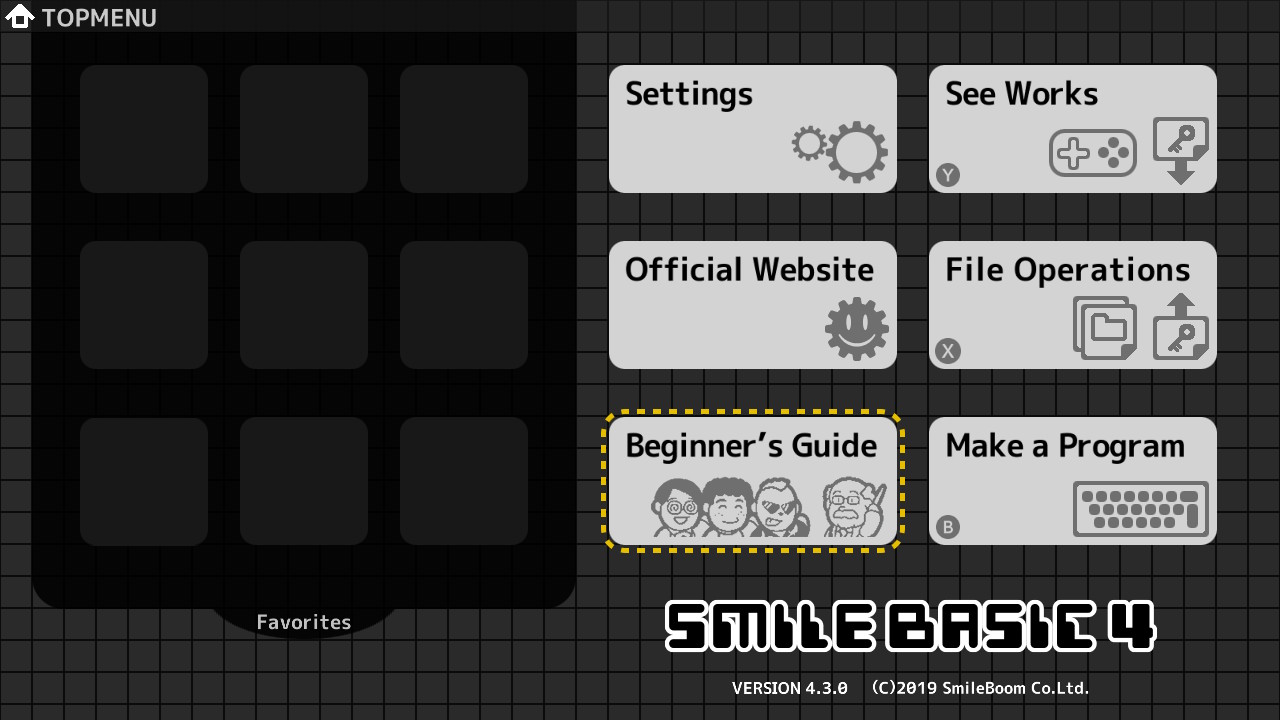
SmileBASIC 4
Click the picture for the unscaled version.
Petit Ordinateur
Petit Computer is the first of a series of BASIC development environments developed by SmileBoom allowing an user to play and program directly on a console. It started as a DSiWare then got sequels on 3DS, Wii U and the one I’ll talk about on Switch. For the sequels, the software was renamed into the name of the programming language, SmileBASIC. Here’s a small example of code to give an idea of the syntax:
' I'm a comment.

' This is a routine
DEF HELLO
	PRINT "HELLO WORLD"
END

CLS ' Clears the default text screen (layer 4).
VAR TEMP = 2
FOR I=0 TO 5
	HELLO
	TEMP = TEMP + I
NEXT
PRINT "TEMP=", TEMP
And so on. It’s a rather simple sample and you actually don’t have to always type in uppercase, I’ll leave it like this for fun, yet it’s far from what the actual system can handle. We’re far from your run-of-the-mill calculator. We’ll see a little bit more lower in the post.
The SmileBASIC family could be considered as fantasy consoles as how their
system emulates the feel of an 80s micro-computer with a CLI, a section
dedicated to code, a few tools built-in, to edit graphics or insert snippets and
that’s all. People having experience with fantasy consoles like Pico-8 and its
cohort will feel close to home, but not quite. I got myself tripping on the
FOR/NEXT or IF/ENDIF delimiters more often than I’d admit because I’m too
used of Lua using end to finish all kinds of scopes.1
Note that each one of the different iterations has a different feature set. For instance the 3DS version (SmileBASIC 3) has extra operations to use the 3D stereoscopy while the Switch version has functions to allow usage of the IR camera or the Toy-Cons. This blog post will focus on the iteration running on the Nintendo Switch.
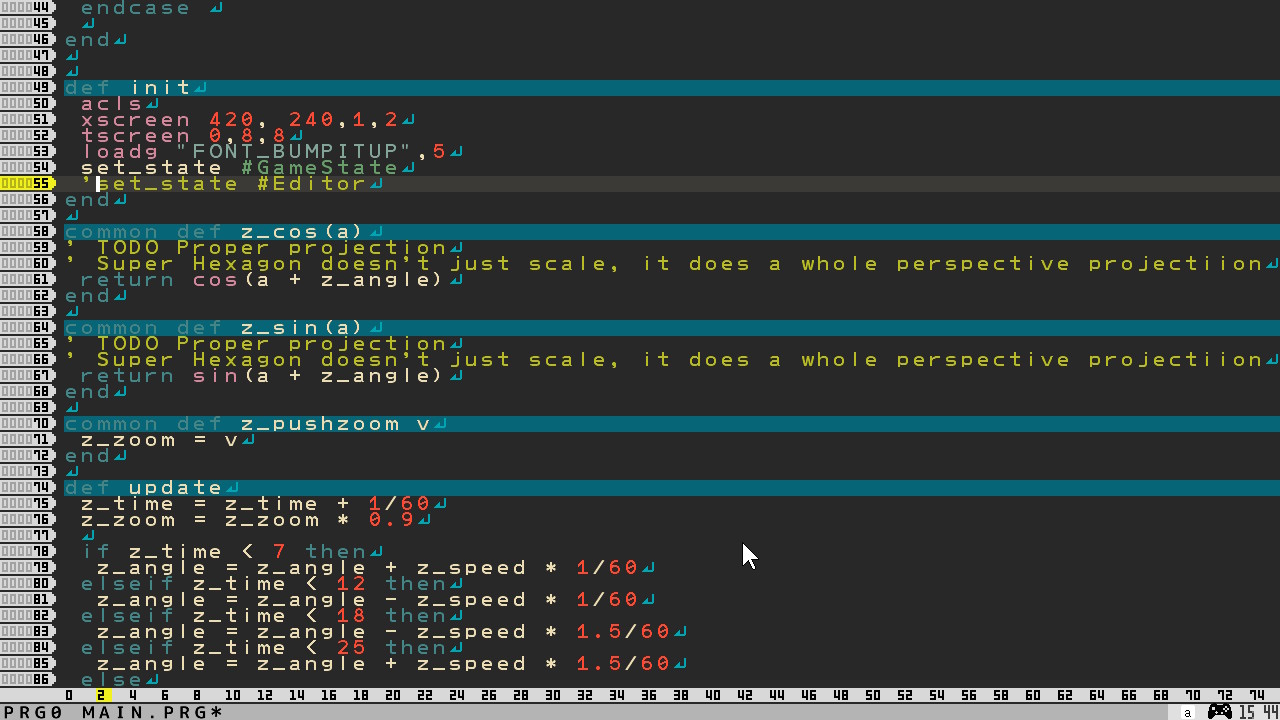
The code editor.
I told you you could use lowercase. Click the picture for the unscaled version.
Smile at me simply, fourth iteration
SmileBASIC 4 is thus the Switch’s version of this little fantasy console. I was pretty happy to learn it’d release worldwide after seeing that it was an exclusive program for the japanese store for a few years. I did play around on Petit Computer and SmileBASIC 3 but the fact that you had to use the touchscreen to type code made doing bigger stuff than Hello Worlding was rather tedious, even with the autocomplete bar feature. The screen’s small, I had hands a little too big for the stylus and using an external tool on a computer would break the flow I’d have with the tool and break the portable requirement of my dream setup, so at that time I could just continue fooling around on Pico-8 instead.
Enter SmileBASIC 4. It still has the touch keyboard to type on the fly directly on the console but2 not only you have the ability to split the screen vertically or horizontally to let the keyboard coexist with the code the way you prefer, but even better, it also has the great great feature to be compatible with USB keyboards and mice. So far I haven’t tried with an USB hub in handheld mode, but so far it’s a blast using the Switch a like a vintage-ish micro-computer, really. I’ll have a look in the future for devices allowing handheld programing with a physical keyboard.
The code editor is rather pretty solid: you get a clipboard, you get a search/replace function, you get an auto-completion for built-in functions or keywords, you can select one on three different font scales, you can tweak your code editor’s color theme, yes. Gruvbox-dark Medium it is! I could also point at the multiple program slots, but they’re a bit tricky to deal with and I will detail them a bit later. I’d love a symbol list to quickly jump between functions but man, I already have enough stuff to go by.
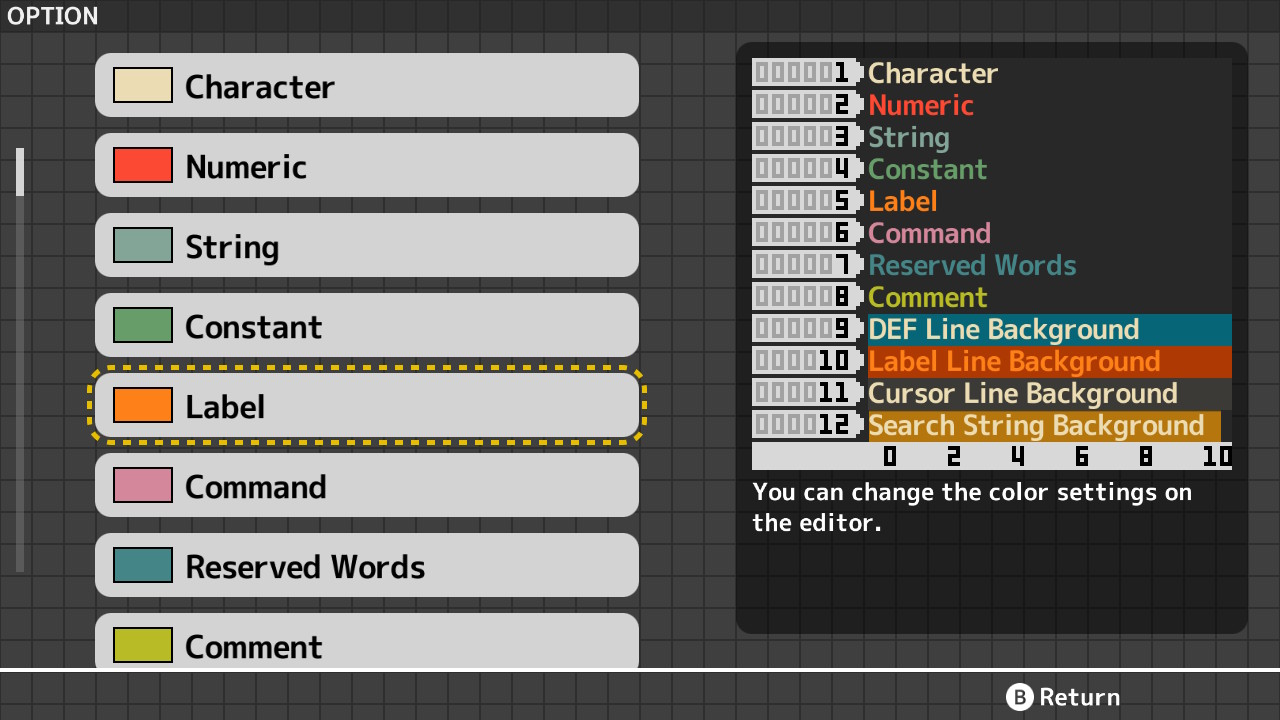
The code editor color settings
Of course I slapped Gruvbox-dark on it. Click the picture for the unscaled version.
The system splits its files in projects. A project is similar to Mac OS X’s applications where they’re actually folders you can launch or introspect the files inside. You have a few system-marked sample and tool projects you can look into to learn the ins and out of SmileBASIC or have a few references but you can’t overwrite or delete them. Fair warning, some of them are as old as Petit Computer and might not reflect how code could be like with newer features (like proper functions). You can also note that the system tools like GAHAKU are actually programmed in BASIC too, which is pretty an amazing feat. I haven’t tried to customize it but it’s probably very doable, just don’t forget to edit a copy of it.
From the project list, you can directly access to the online repository where you can download other people’s projects to launch or remix the code from. Unlike Pico-8’s SPLORE, you can only download and save before playing a project. There is tagging and filtering, but I wish there would have been a text-based search as the repository is getting a bit large. Here’s for instance a transcript of me querying the current file listing of my Super Hexagon clone:
OK
files
-- 7 FILES --
DAT:GAHAKU.OPT
GRP:@BACKUP.GRP
GRP:FONT_BUMPITUP
TXT:@BACKUP.PRG
TXT:DATA
TXT:GAME_STATE.PRG
TXT:MAIN.PRG
Heads up before trying to download a lot of stuff or upload projects. To allow the servers to run for a while, the developers restricted the upload abilities into slots that have to be bought in order to use them and in the same way, slowed down the download capabilities until you buy at least one slot pack. So if you want to be an active member of the community, you’ll be expected to shell an additional amount. That’s a good thing to know before.

The "Published Works section".
A few published games and the program’s manual. Click the picture for the unscaled version.
Programming, the game.
Now, let’s talk about the programing bit. Being a member of the BASIC family
tree, it’s rather verbose and tends to use statement structures closer to
English than C. You get code flow keywords like if then else endif instead of
if () {} else {} or for i=0 to 5 instead of for (int i = 0; i < 5; ++i),
you get a var keyword (or dim) to declare variables. There are labels and
gotos, but also routines and functions with a different syntax. There are typed
arrays that can go on multiple dimensions (with a twist). There are enumerations
and constant variables so you can easily give a name to a magic value instead of
just keeping that cryptic +25 in your GUI code.
The enumerations really was a surprise for sure, but a welcome one. It’s a
shortcut to declare multiple const in the same statement with the same
auto-increment bit than C’s enumerations. I didn’t expect to be able to have
those at hand, they’re quite good, specially to declare states for state
machines and they work rather well with the brand new case conditional code
structure.
Another interesting note is the way it handles functions. Being as step-up from
call label-based subroutines, you have a few calling conventions, depending on
the number of arguments or return values. SmileBASIC 4 even handles variadic
functions and multiple return values marked with OUT.
DEF SIMPLE_FUNCTION
END

DEF FUNCTION_WITH_ARGUMENTS A,B,C
END

DEF FUNCTION_WITH_RETURN_VALUE()
	RETURN 4	'Chosen by fair dice roll.
				'Guaranteed to be random
END

' Using OUT implcitely declares the variables locally
DEF FUNCTION_WITH_OUT_VARIABLES OUT ONE, TWO
	ONE = 1
	TWO = 2
END

'Now let's call them

SIMPLE_FUNCTION
FUNCTION_WITH_ARGUMENTS 135, 169, 42
FUNCTION_WITH_RETURN_VALUE()

VAR RESULT_ONE, RESULT TWO
FUNCTION_WITH_OUT_VARIABLES OUT RESULT_ONE, RESULT_TWO
Around physical devices, SmileBASIC doesn’t lack features. You have a function set to query the controllers’ buttons and joysticks, but also to reqest the gyroscope and accelerometer states. You can also use the Rumble HD with a small predefined vibration patterns and even pan the vibration on left or right.
You can query the touchscreen when it’s available (so undocked), the mouse and keyboard’s states, and you can also query stuff relative to the Nintendo ToyCons too, like the piano or the infrared camera on the right JoyCon! I was really impressed that it worked, even if I had as a result an IR capture worthy of a Gameboy Camera’s photo minus the framerate and the dithering (so its charm).
In SmileBASIC 4, The button naming keeps the same idea than Nintendo when coming
to naming/identifying them : instead of referring to ABXY, they use instead
their position and the side of the controller they’re on. So on a JoyCon pair,
the arrow pad will be #B_LUP, #B_LDOWN, #B_LRIGHT and #B_LLEFT, where
ABXY will be #B_RUP, #B_RDOWN, #B_RRIGHT and #B_RLEFT. This scheme is
replicated on the sideways JoyCon or the Pro Controllers to keep it consistent.
That was a clever move as it simplifies a lot the question of mapping controls
on different controllers the same way Nintendo generalized their button
indications. It makes me wonder if that wasn’t imposed by Nintendo’s submission
guidelines to keep it consistent with the rest of their games or if it was just
a comfort feature.
VAR PLAYER_X=0
VAR PLAYER_Y=0

WHILE TRUE DO
	IF BUTTON(0, #B_LUP) THEN
		DEC PLAYER_Y ' equivalent to PLAYER_Y = PLAYER_Y - 1
	ELSEIF BUTTON(0, #B_LDOWN) THEN
		INC PLAYER_Y ' equivalent to PLAYER_Y = PLAYER_Y + 1
	ENDIF
	IF BUTTON(0, #B_LLEFT) THEN
		DEC PLAYER_X
	ELSEIF BUTTON(0, #B_LRIGHT) THEN
		INC PLAYER_X
	ENDIF

	GCLS
	GFILL PLAYER_X - 4, PLAYER_Y - 4, PLAYER_X + 4, PLAYER_Y + 4, #C_RED
	VSYNC
WEND
SmileBASIC 4 is a bit trickier when it comes to graphics. Its main design decision comes from nostalgia for the 70-80 consoles and micro-computers, but with a more recent twist. There is mostly three ways to draw stuff on screen : using the graphic drawing routines, printing text or using the sprites.
It can display stuff on 7 customizable layers which can be customized to a point. Those layers can be filled with “pages” (or screens). You have 5 text pages (that can also act as tilemaps) and 7 graphics pages with three of them being reserved for specific tasks (one to host the graphic routine drawings, one to hold the font graphics and one for the sprite graphics). The seven layers are composed of the text pages, the graphic drawing graphic page and the sprites (that can be draw with any layer) and you’re free to reorder the layers’ content to fit your work’s requisites but you can’t add more of them or use the extra graphic pages directly, you’ll have to blit their data to the reserved graphic page. Take a breath, re-read the paragraph, because it’s a tricky one. Sorry.
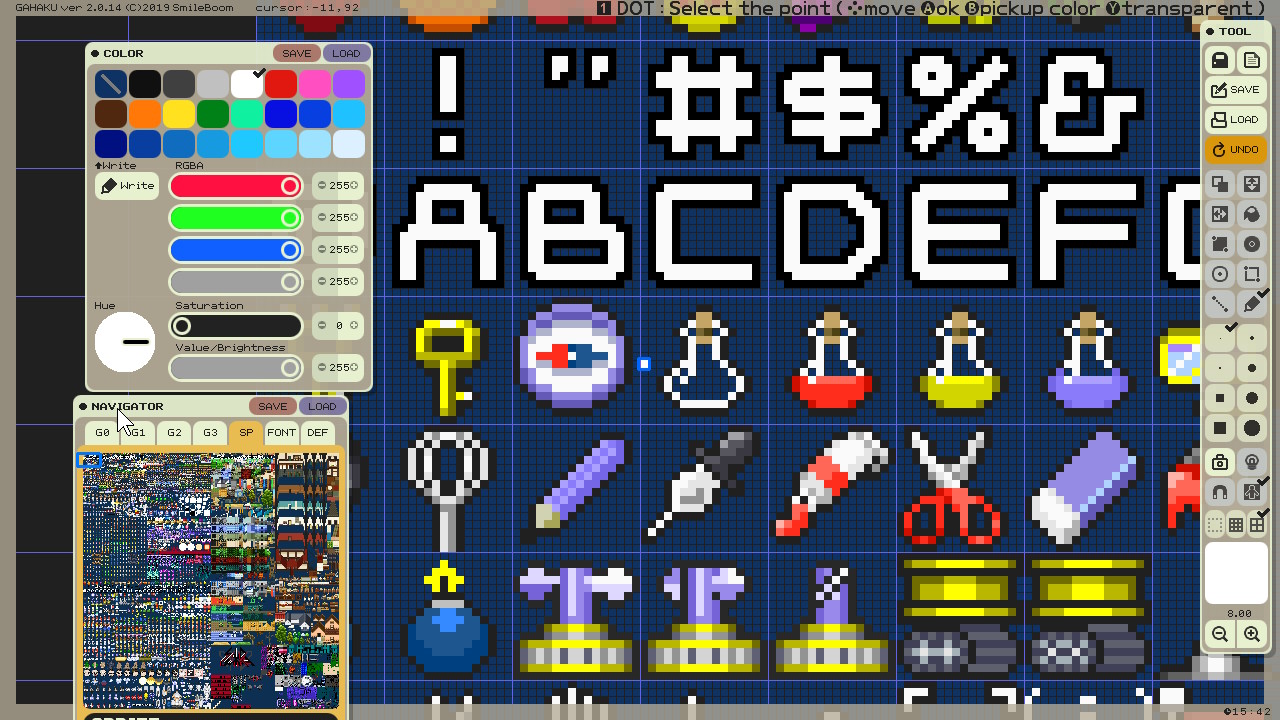
GAHAKU. The bundled graphics editor.
Yes, the mouse is the game’s. Click the picture for the unscaled version.
You also have the ability to set effects per layer. From color hue/brightness/value to mosaic effects to even raster-effects to make effects like Castlevania’s tubular castle or Earthbound’s battle background3. They’re exclusive and also affect the layers lower in the stack, so be mindful of the layer order.
The text layers are a bit more useful than just drawing text. In Petit Computer,
you had a text page and map pages along the graphic pages. To draw text it was
mostly ending up on that specific text page or on the draw on the general
graphic buffers. SmileBASIC 4 removes the distinction between text and map
layers and graphical characters can be drawn by specifying a value in a specific
range. Thus the text screens become both useable for text and graphical stuff in
the same time. It sounds weird but it’s in line with how consoles like the NES
worked. For instance the NES only had 8x8 tiles that are tiled together to make
the map or the text dialog. In most of the games, drawing text was a matter of
overwriting the “map” graphical data and drawing it again once the text is gone.
Old consoles linguo will mention words like CHR to denominate the memory
related to “characters” (or “tiles”).
I haven’t got to use it for a map yet and sadly, the fourth version of
SmileBASIC doesn’t have a map editor bundled with. But as those layers are both
text and graphics, you can load strings and directly use them as map data or use
the DATA directive to load data stored next to a label with READ. Funnily,
with the CLIPBOARD command, you can store graphical characters and paste them
in the code editor. It’s actually fun to see clouds and characters in what
previously looked like a text screen.
' Draw some text on text layer 0
LOCATE 0, 10, 10
TPRINT 0, "Hello World"
SmileBASIC also has got a sprite list, similarly to the older consoles’, for
instance the Gameboy’s OAM (Object Attribute Memory). Up to 4095 sprites can be
drawn this way (the 4096th is used for the graphic page, another trick). If
handled properly, it eases the drawing process where you just have to update a
sprite’s frame or coordinates once to automatically update it when the console
updates the screen’s content and keep it there, no need to mention the sprite in
both the update and the drawing parts of your code. I also suppose their drawing
is faster than managing yourself the drawing logic with GPUTCHR commands.
You also have the ability to define sprite animations to dynamically change values like the coordinate or the frame index, allowing you to quickly get animated graphics withut resorting to having complex code to handle it. You also have the ability to choose between instant change or linear interpolation between two frames, what a luxury!
SPSET 0, 120 'Using the sprite definition n° 120
SPOFS 0, 64, 128 'Moving the sprite to (64, 128)

'And that's all, no need to call something like DrawSprite()
I’d say, the fantasy console is rather punchy, While I was making a clone of
Super Hexagon for fun with the brand new triangle routine GTRI, and I couldn’t
make the console slow down at all, even after 200 triangles or so. So unless you
chug a lot of sprites or do a lot of math, you shouldn’t have any framerate
issues for small to middle projects. The only issue I had was regarding the
synchronization between clear operations and drawing stuff. Mind the placement
of your VSYNC in your code.
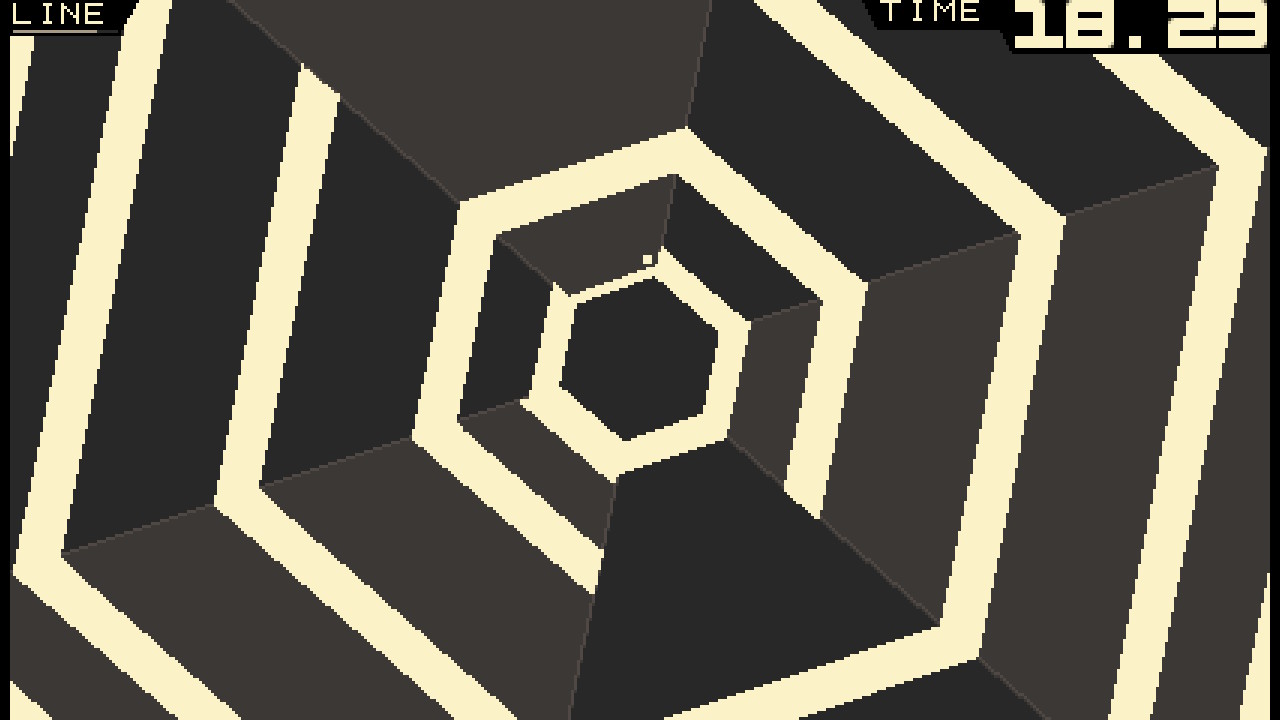
Smile Hexagon. A small WIP project.
Why do I keep making clones? Why do I keep doing the same projects? Click the picture for the unscaled version.
I haven’t touched a lot the audio functions, I usually do silent prototypes due to my habits of making games on calculators or focusing only on the engine bits, but as far as I know it supports MML, which is a text-based way to describe a music’s data that take its root from the micro-computer BASIC era. SmileBASIC also has a lot of bundled sequencer instruments and has a few built-in musics. A small selection of SFX also is part of the bundle (even though I wished for more).
The console also has a small sound filtering utility to add realtime effects like cave-like reverberation to the sound, to vary the pitch or pan. It looks like it also can load PCM data and do some FFT processing an biquadratic filtering but I can’t really confirm how well it works. I think a lot of people will already have some fun with the MML sequencing already, there already are some music sequencers available for download. Add a small speech synthesis function over it and we have listed more or less what the console can do with your speakers.
' Play the C major scale
BGMPLAY "CDEFGAB<C"
' Play a sound
BEEP 16
' Set up a cave-like sound filter/effect
EFCEN #EFCCAVE
Let’s talk about the least polished parts. I think one of the most important
issues is the English translation. While it’s quite understandable and I welcome
its presence magnitudes over having days worth of headache trying to understand
Japanese, there’s a few issues with it, using weird sentences constructions or
missing a translation here or there. You can see this happening in the in-game
manual or in the tutorials. A lot of command listings are in two-columns tables
and most of the listed commands are cut in two lines, even for short commands
like ACLS (load factory settings for all graphic parameters). Sometimes the
commands’ explaantion is not totally clear. Just look up at VSYNC and WAIT
and find the difference (VSYNC waits until n vblanks have passed where
WAIT will wait for the equivalent time of n/60 seconds).
The other one doesn’t come from SmileBASIC itself but rather from Nintendo’s newer policies about user generated content. After living through a few consoles seeeing their security bypassed with more or less total control on the machine, Nintendo tried to drastically cut down the Switch’s potential attack surfaces, like removing most of the features related to foreign files on SD cards or dropping the camera. Petit Computer and the 3DS version had some alternative ways to deal with that, notably by sharing data through QR Codes (up to ~30 for the biggest projects, those were fun to import) or you could use an homebrew file explorer to do the import/export process for the 3DS version.
The Switch doesn’t have a camera nor SB4 allows for SD card prodding, so the
easiest way we had to send files over the console from a computer is not an
option anymore. For code, the task can vary between fine and boring, most
projects won’t weigh megabytes of code but it’ll be still at most as many
keypresses you’ll have to do, but for textures, it’s another history. Graphic
pages are as big as a 4096x4096 texture and as you cannot import a texture from
outside, your only option left is to edit around the texture with the provided
tool (GAHAKU) or one of the tools you could program or download from the
community. For a few sprites, you’ll be fine, but starting with a few dozen of
them, it can become a bit tedious.
I quickly realized how much a chore it might be when recreating Super Hexagon’s
font, Bump IT UP. Good thing GAHAKU has a quite good
mouse support. That being said, I read a few mentions of using Arduino to
automatically type data by emulating a keyboard’s key events, that might work
well if coupled with some decompression routines. I might look that up later…
Around the World
The last thing to note is that by the time I’m writing this post, SB4 will be one year old and was mostly exclusive to the japanese eShop, meaning that most of the creations are written in japanese, the worldwide community is slowly catching up. So for a while you might see only games with japanese text. On my side, I’ll resort to guess and figure the buttons, I hope you’ll be also able to give a try to some of those games!
Also, a programing contest is currently happening! Indeed, the SmileBASIC Oogiri World Grand Prix is running since December 24th 2020 to March 1st 2020 and bears the theme “Smile”. I kinda want the snacks prize.
Anyway, that’ll be all for today. I’ll keep plans on writing a second post to list a few programs or games I found interesting or fun to play, the article is already quite chunky like that. See you next time!
A few links
- SmileBASIC 4’s English page
- SmileBASIC Source, an active community site’s SmileBASIC 4 section, slowly migrating from the 3DS’ section.